Revamp old shoes
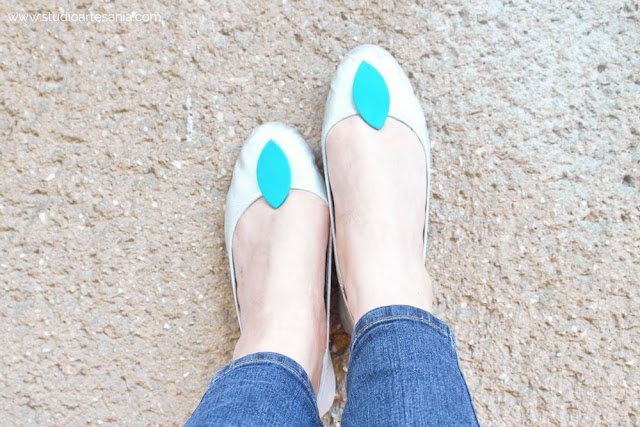
I have that thing for flat ballet pumps. We are in love since my childhood when I practiced ballet. Unfortunately, my dream of becoming a prima ballerina was not achieved, but the love for ballet and ballet shoes has remained to this day. I own several pairs of ballet pumps, and among them are brown ones that are very old and worn out. I love that shoes, but it's obvious that they had definitely seen better days. Even though they no longer looked particularly great and had been worn into submission, they are so comfortable that I had to save them and turn them into something gorgeous - the shiny silver flats. Here is what I did to makeover those shoes to be wearable again.
Materials and tools
Old shoes
White and silver acrylic paint
Semi-hard paintbrush
Silver glitter Eva foam sheet
Scissors
Pencil
Glue
Step 1.
Step 2.
After both coatings of white acrylic paint were dried, which took about half an hour (15 minutes for each coating), in the same way, I applied silver acrylic paint. Again, I applied two coating.
These shoes are not intended for walking in the rain, so acrylic paint is not in danger of spilling. Anyway, I tested them under a jet of water and the paint remained completely intact.
I removed old dirty insoles and used them to make templates for the new ones. With the pencil, I traced the shape of insoles on the back of the foam sheet and cut them out with the scissors.
Step 3.
Step 4.
Then I applied the adhesive (glue) to the back of the insole and placed it into the shoe. It's best to apply the adhesive gradually - from the heel to the toes, and gradually to put it into the shoe with the gentle pressure of your fingers.
That way I was able to put the insole in the right place and correct the position when was needed. I left the shoes overnight so the glue can completely dry. To hide the traces of bows I put a decoration in front of the shoes. The process of making the decoration I will show you in the next tutorial. And, that's it! My new shiny silver shoes were ready for a walk.
That way I was able to put the insole in the right place and correct the position when was needed. I left the shoes overnight so the glue can completely dry. To hide the traces of bows I put a decoration in front of the shoes. The process of making the decoration I will show you in the next tutorial. And, that's it! My new shiny silver shoes were ready for a walk.
If you loved this DIY project, go ahead and share it with your friends on social media. Sharing will be much appreciated. And, if you revamped some of your favorite shoes show them to me on Instagram by using the hashtag #StudioArtesania.


0 comments